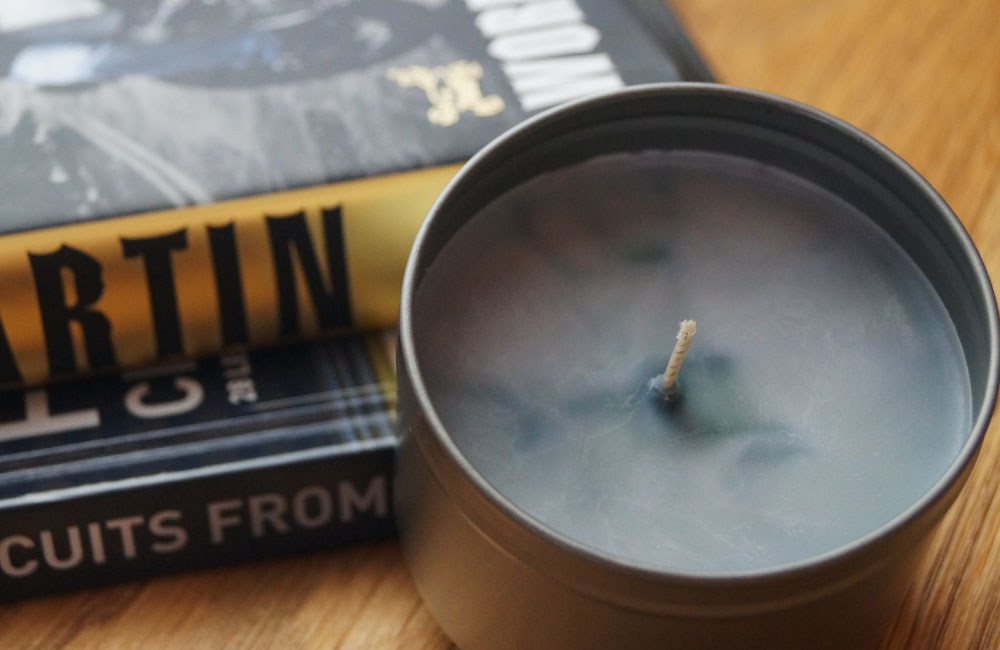
Bring a smile to any Dads face with a unique home-made candle, which you can easily personalise with his favourite colour and your own unique label. Below is our guide for making a two-tone marble candle with a choice of wick finishes.
Ingredients
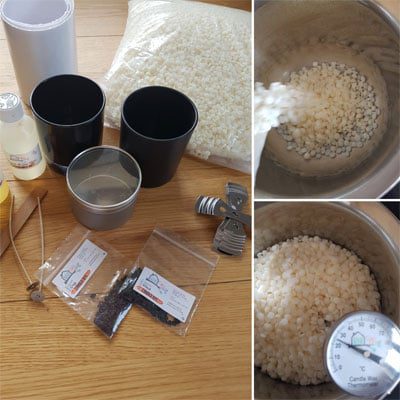
- Approx. 250-300g of either Kerawax 4105 or Kerasoy 4130 (per candle)
- 3g of Bekro Dye (colour can be of your choice we used 6000/01 Black)
- 50ML bottle of a Fragrance Oil of your choice (we recommend Teakwood, Creed or Aqua Di Gio)
- 1 TCR 33/18 (per candle)
- 1 Glue Dot (per candle)
- 1 Matt Black 30CL Karen Glass
- 1 250ML Silver Round Tin with Window
Method
Step 1
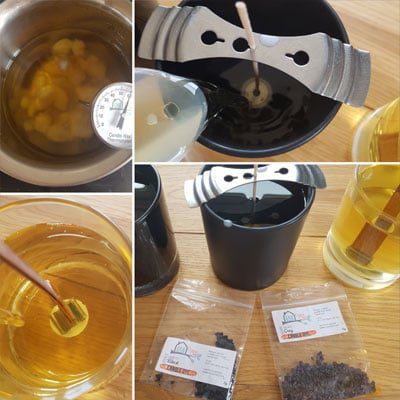
Pour the required amount of wax into your melt pot (I am using one of our Bain Maries.) Don’t let the temperature of the wax exceed 70°C, so keep an eye on your thermometer reading. If you need help working out how much wax you need per container, please follow our guide Percentages & Measurements When Making Candles.
Step 2
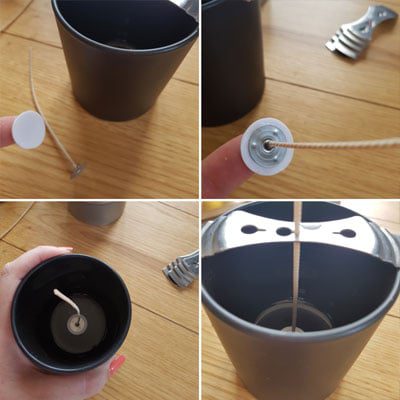
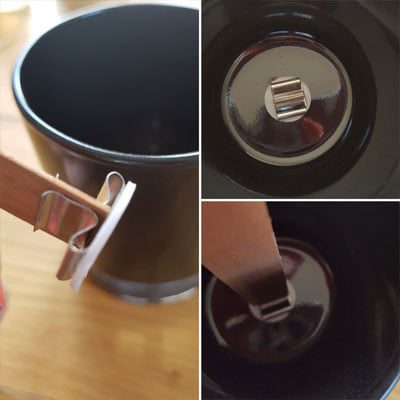
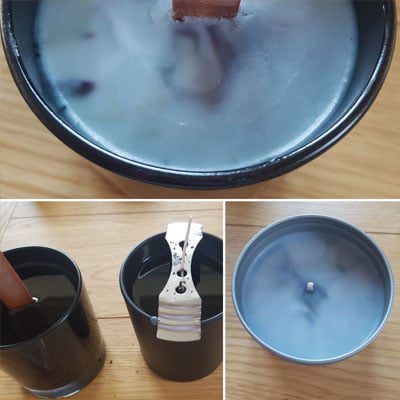
Preparing your glass ready for pouring the wax is a relatively simple process. Tab the sustainer on the wick with one of our Glue Dots and stick down in the centre of the container. Then, using a wick centering tool, hold the wick in place from above. If you don’t have one of these, not to panic, using a garden peg can have the same effect. Don’t forget to keep checking the wax and its temperature.
Step 3
If you are using the wooden wick instead, you need to put a glue dot onto the sustainer and place this into the centre of the base of the container. Then taking your two pre-waxed wooden wicks place them together and insert into your sustainer. If you need help with waxing the wood wicks, please see our guide Pre-waxing your Wooden Wicks.
Step 4
Once your wax has fully melted, cool the wax slightly. If you are using fragrance oil you will need to add it at this point (you can use our Percentages & Measurements When Making Candles guide to help with volumes of fragrance required). Transfer the wax into your pourer. Slowly pour the wax into you prepared containers and leave to settle for approx. 5 minutes. If the room temperature is cold only leave for 2-3 minutes.
Step 5
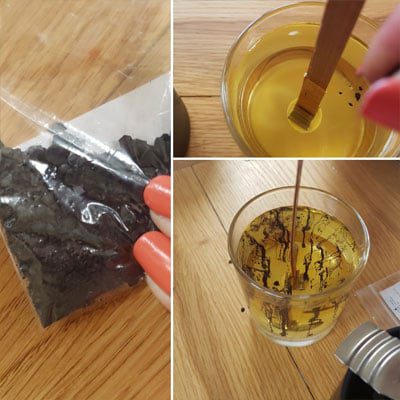
Whilst the wax is being left to cool in the container, take your choice of dye chips and crush these into smaller pieces. You can do this either with your fingers or alternatively you can use a pestle and mortar if you prefer. Once the wax has been left to cool, take a pinch of dye and gently drop into the molten wax sparsely. Drop from a low height, as close to the glass as you can so that it drops slowly through the wax.
Step 6
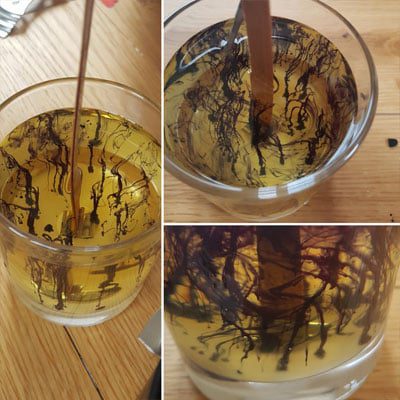
Leave the dye to settle and dissolve slightly in the wax for a minute or two max. Using a thin pointed object (knitting needle, temperature thermometer) slowing move the needle around to create a swirling marble effect. Please do this gently or you will cause the dye to fully dissolve into the wax losing the marble candle pattern.
Step 7
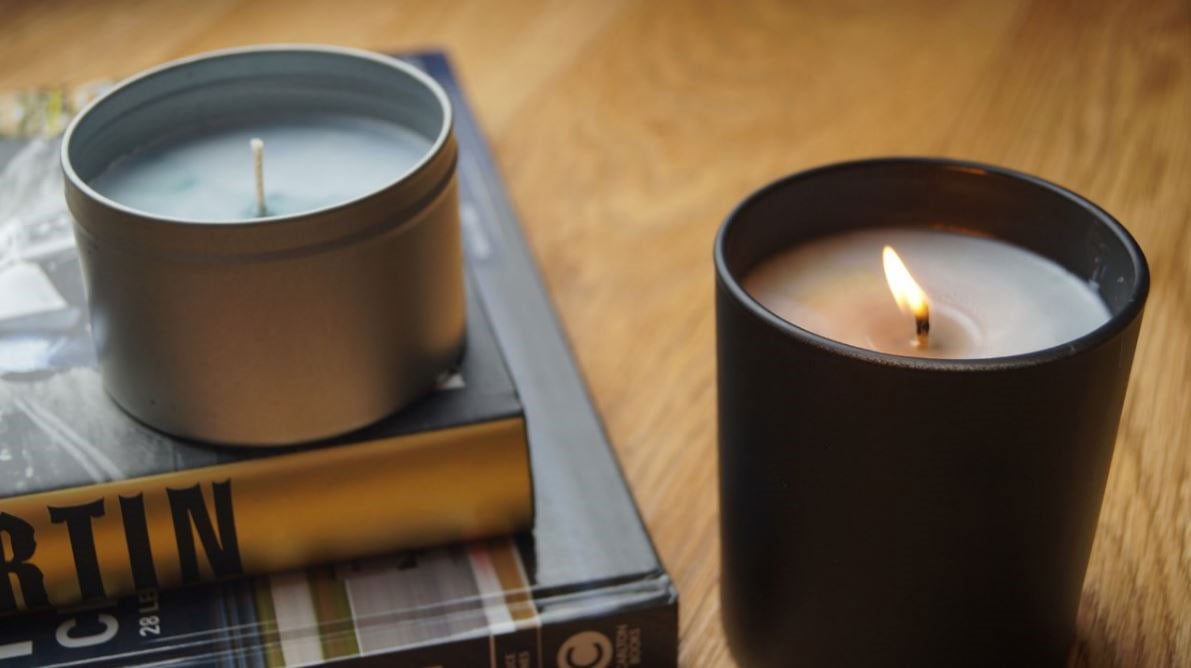
Leave the candles to fully cool for at least 24 hours but if using fragrance oil, we do recommend a preferred time frame of 5 to 7 days to allow the fragrance oil and wax to cure properly ensuring a better scent release when burning.
All there is left to do now is to create your personalised label for your marble candle! Simply grab some pens and a plain white label or alternatively why not grab some silver paint and hand print the outside of the black glass for smaller children?
Follow us on social media and tag us in your creations. We love to see what you have been making!


